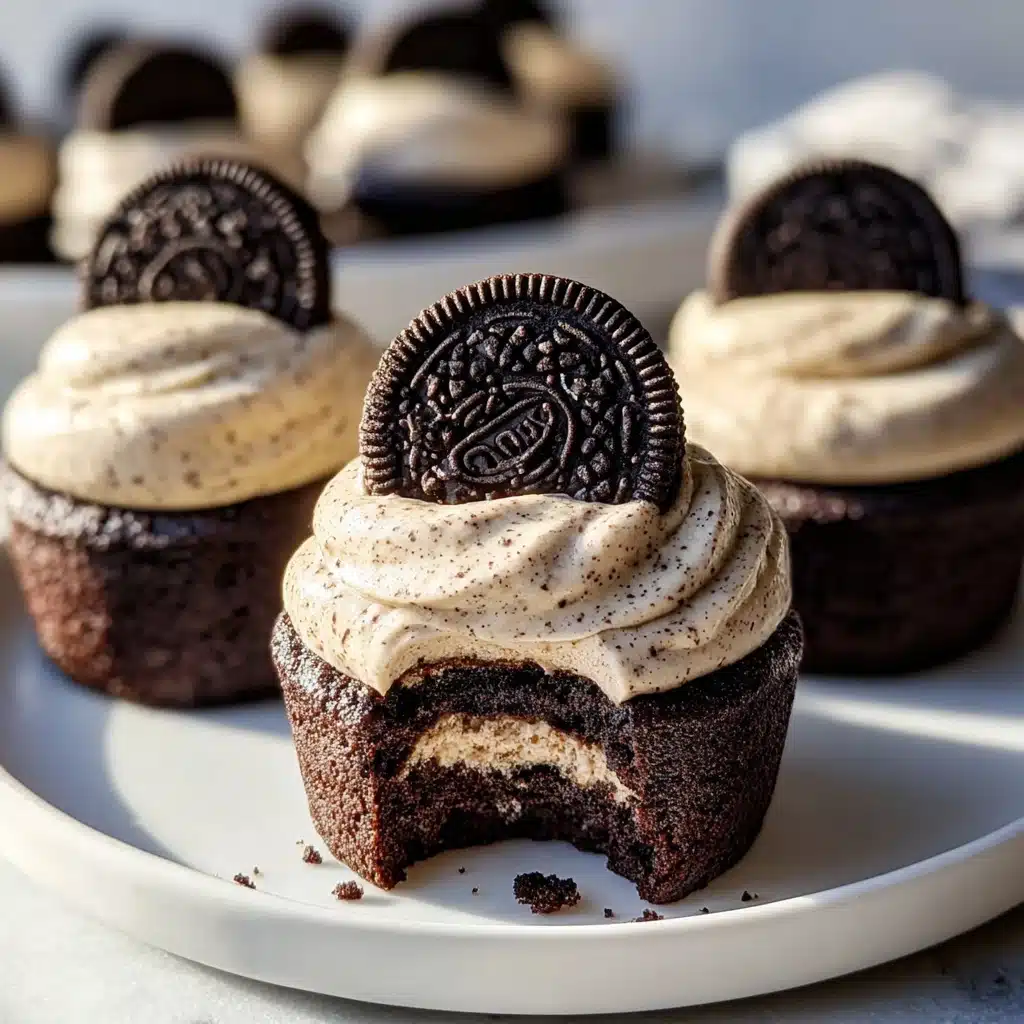
Oreo Cheesecake Cookie Cups Recipe
If you have a soft spot for rich, indulgent desserts that combine the best of cookies and cheesecake, then you’re going to be over the moon for these Oreo Cheesecake Cookie Cups. This delightful treat brings together the classic crunch and chocolate flavor of Oreos with a creamy, dreamy cheesecake filling, all perfectly portioned in cute, individual servings. They’re not only scrumptious but also incredibly fun to make and share, making any gathering feel instantly special. Whether you’re a seasoned baker or just starting out, these Oreo Cheesecake Cookie Cups are your new go-to dessert to impress everyone without breaking a sweat.
Ingredients You’ll Need
Getting the ingredients right is the first step to nailing this recipe. Each component plays a crucial role: the Oreos provide the iconic base and flavor, the cream cheese and sour cream create that lusciously smooth filling, and a touch of butter brings everything together with the perfect texture.
- 20 Oreo cookies: Crushed to form a flavorful, crunchy crust that’s the foundation of these cookie cups.
- 5 tbsp unsalted butter, melted: Binds the Oreo crumbs and adds richness without overpowering the flavors.
- 8 oz cream cheese, softened: Delivers the creamy, tangy texture essential for authentic cheesecake filling.
- 1/2 cup granulated sugar: Sweetens the filling just right, balancing the slight tartness of the cream cheese.
- 1/4 cup sour cream: Adds moisture and a subtle tang to keep the cheesecake filling silky and smooth.
- 1 cup whipped cream (for topping): Lightens the dessert with a delicate and airy finish that complements the dense cheesecake.
- Optional: 1/4 cup mini chocolate chips: Stirring these in gives an extra pop of chocolate flavor and a fun texture surprise.
How to Make Oreo Cheesecake Cookie Cups
Step 1: Prepare the Oreo Crust
Preheat your oven to 350°F (175°C). Crush the Oreo cookies into fine crumbs—using a food processor or placing them in a ziplock bag and smashing them with a rolling pin works great. Mix these crumbs with the melted butter until every crumb is coated. This combo forms the perfect crust, crispy yet tender when baked.
Step 2: Form the Bases in a Muffin Tin
Line a muffin tin with cupcake liners to keep things tidy and make serving a breeze. Press about a tablespoon of the Oreo crumb mixture into the bottom of each lined cup. Press firmly but gently to create an even, compact base that holds up against the cheesecake filling without crumbling.
Step 3: Make the Cheesecake Filling
In a mixing bowl, beat the softened cream cheese and granulated sugar together until fluffy and creamy. This part is crucial for that smooth, luscious texture everyone loves. Add in the sour cream and continue mixing until everything is perfectly blended with no lumps. For an added chocolatey treat, fold in the mini chocolate chips gently.
Step 4: Assemble and Bake
Spoon the cheesecake mixture onto the Oreo crusts, filling each cup almost to the top but leaving a little space for rising. Bake in the preheated oven for 15 to 18 minutes until the cheesecakes are mostly set but still have a slight jiggle in the center. This ensures they stay creamy and don’t dry out. Let them cool completely on a wire rack before moving on.
Step 5: Chill and Add Whipped Cream
After cooling, refrigerate the cookie cups for at least a few hours to let the cheesecake filling firm up beautifully. Right before serving, top each cup generously with whipped cream and a sprinkle of crushed Oreo crumbs for that final touch of elegance and extra oomph!
How to Serve Oreo Cheesecake Cookie Cups
Garnishes
Nothing beats the simple glamour of a fluffy dollop of whipped cream crowned with a sprinkle of crushed Oreos. Feel free to get creative and add a drizzle of chocolate sauce or a dusting of cocoa powder to elevate the look and taste.
Side Dishes
Serve these cookie cups alongside fresh berries or a scoop of vanilla ice cream for a contrast of temperature and texture. A cup of hot coffee or a glass of cold milk also pairs wonderfully, balancing the sweet richness perfectly.
Creative Ways to Present
For a party, arrange the Oreo Cheesecake Cookie Cups on a tiered dessert tray or place them in mini cupcake wrappers with colorful designs. You can even make a dessert platter with assorted toppings like chopped nuts, caramel drizzle, and sprinkles so guests can customize their own treats.
Make Ahead and Storage
Storing Leftovers
These Oreo Cheesecake Cookie Cups keep best when stored in an airtight container in the refrigerator. They stay fresh and delicious for up to 3 days, making them an ideal make-ahead dessert for any occasion.
Freezing
If you want to save some for later, freeze the cups without whipped cream topping by placing them in a freezer-safe container. When properly wrapped, they can be frozen for up to one month. Thaw overnight in the fridge for best results.
Reheating
Since these are cheesecake-based, reheating is usually unnecessary. If you prefer them slightly warmer, let them sit out at room temperature for 10-15 minutes instead of microwaving, which could alter the texture.
FAQs
Can I use a different cookie for the crust?
Absolutely! While Oreos are classic and flavorful, you can experiment with other chocolate sandwich cookies or even crushed graham crackers for a different twist.
Do I have to bake the cheesecake filling?
Baking helps set the filling and ensures the texture is just right. However, no-bake versions exist, but they require gelatin or other stabilizers to hold shape.
What if I don’t have sour cream?
You can substitute sour cream with an equal amount of Greek yogurt, which will provide similar tanginess and creaminess.
Can these be made vegan?
With some ingredient swaps like vegan cream cheese, dairy-free whipped topping, and vegan cookies, you can create a delicious vegan-friendly version.
How do I prevent the crust from getting soggy?
Firmly pressing the Oreo crumbs with butter and slightly baking before adding the filling helps create a crisp crust that won’t become soggy.
Final Thoughts
If you’re looking for a dessert that’s as fun to make as it is to eat, these Oreo Cheesecake Cookie Cups should definitely be on your radar. They bring together the best flavors and textures in a delightful package that’s sure to impress family and friends. So go ahead, give this recipe a try, and prepare for lots of compliments and happy smiles around your table!
PrintOreo Cheesecake Cookie Cups Recipe

These Oreo Cheesecake Cookie Cups combine the rich, creamy texture of classic cheesecake with the crunchy, chocolatey goodness of Oreos, all in easy-to-eat cupcake-sized portions. Perfect for parties or a delicious treat any time you crave a bite of dessert.
- Prep Time: 15 minutes
- Cook Time: 18 minutes
- Total Time: 2 hours 33 minutes
- Yield: 20 cookie cups 1x
- Category: Dessert
- Method: Baking
- Cuisine: American
- Diet: Vegetarian
Ingredients
Crust
- 20 Oreo cookies, crushed into fine crumbs
- 5 tablespoons unsalted butter, melted
Cheesecake Filling
- 8 oz cream cheese, softened
- 1/2 cup granulated sugar
- 1/4 cup sour cream
- 1/4 cup mini chocolate chips (optional)
Topping
- 1 cup whipped cream
- Additional crushed Oreos for garnish
Instructions
- Preheat and Prepare Crust: Preheat your oven to 350°F (175°C). Crush the 20 Oreo cookies into fine crumbs using a food processor or by placing them in a sealed bag and crushing with a rolling pin. Mix the Oreo crumbs with melted unsalted butter until well combined.
- Form Crust Bases: Line a muffin tin with cupcake liners. Press about one tablespoon of the Oreo and butter mixture into the bottom of each liner, firmly packing it to create the base of your cookie cups.
- Prepare Cheesecake Filling: In a mixing bowl, beat the softened cream cheese and granulated sugar together until the mixture is light and fluffy. Add the sour cream and continue to mix until smooth. If using, fold in the mini chocolate chips gently to incorporate them evenly throughout the batter.
- Fill and Bake: Spoon the cheesecake filling over the Oreo crust in each cupcake liner, filling nearly to the top but leaving a small gap to avoid overflow. Bake in the preheated oven for 15-18 minutes. The centers should be set but still slightly jiggly when you gently shake the pan.
- Cool and Chill: Remove the cupcake tin from the oven and allow the cheesecake cookie cups to cool completely at room temperature. Once cooled, refrigerate for at least 2 hours or until fully chilled and firm.
- Add Toppings and Serve: Before serving, top each cup with a dollop of whipped cream and sprinkle with additional crushed Oreos for an extra chocolatey garnish.
Notes
- Ensure cream cheese is softened to room temperature to avoid lumps in the filling.
- Do not overbake; the centers should remain slightly jiggly to maintain a creamy texture.
- Refrigerate properly to allow the cheesecake filling to set well.
- Mini chocolate chips are optional but add a delightful texture and flavor contrast.
- Store leftover cookie cups in an airtight container in the refrigerator for up to 3 days.
Nutrition
- Serving Size: 1 cookie cup
- Calories: 210 kcal
- Sugar: 15 g
- Sodium: 110 mg
- Fat: 13 g
- Saturated Fat: 7 g
- Unsaturated Fat: 5 g
- Trans Fat: 0 g
- Carbohydrates: 20 g
- Fiber: 1 g
- Protein: 3 g
- Cholesterol: 40 mg
Keywords: Oreo cheesecake, cheesecake cups, cookie cups, no-bake crust, creamy cheesecake, party dessert