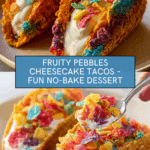
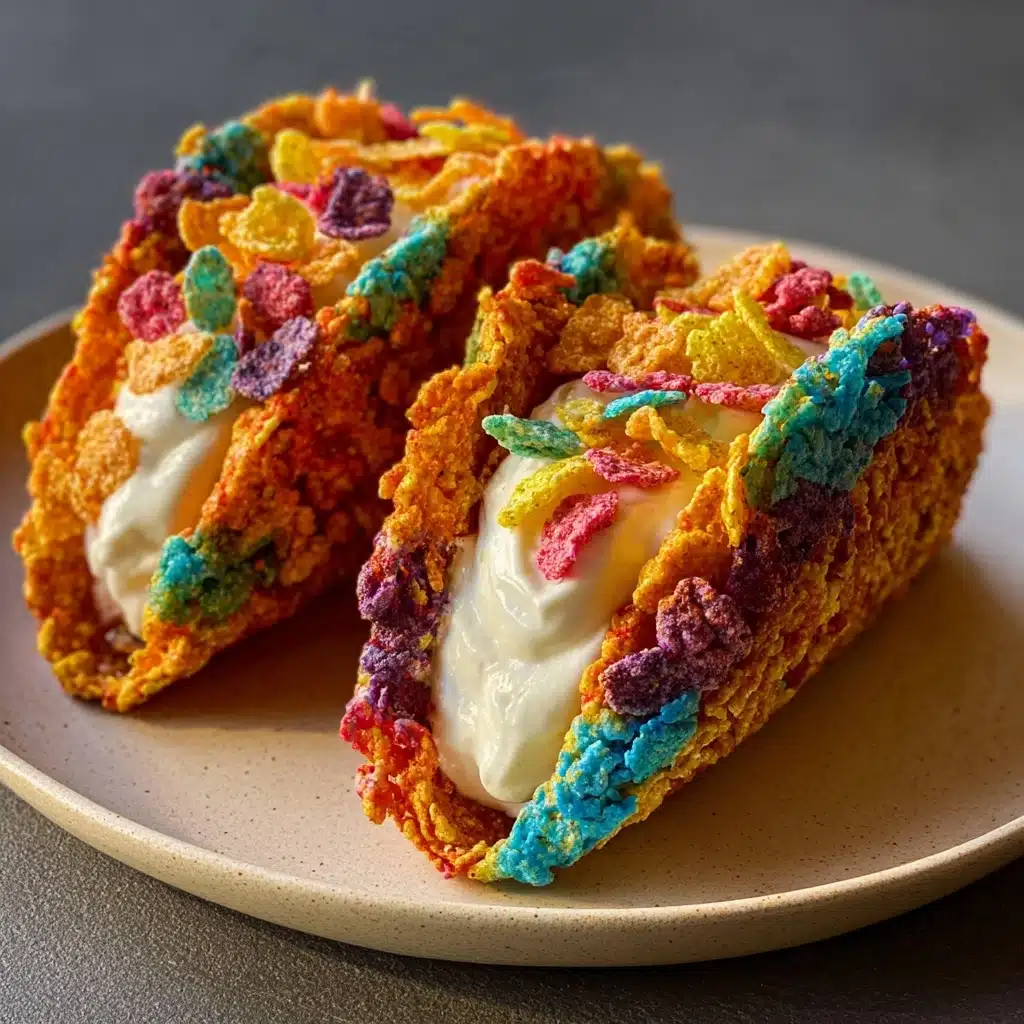
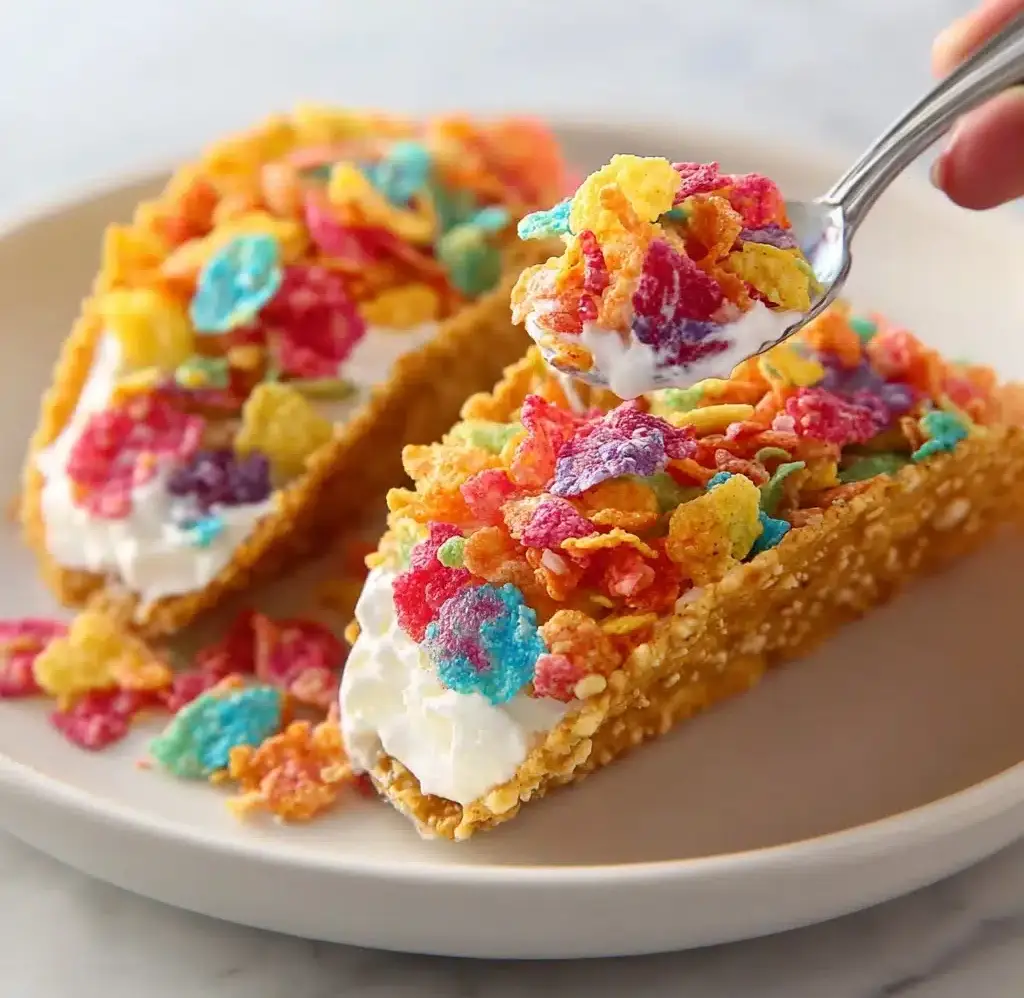
Fruity Pebbles Cheesecake Tacos Recipe
If you have a soft spot for nostalgic breakfast cereals and crave a playful twist on dessert, these Fruity Pebbles Cheesecake Tacos are about to become your new favorite treat. Imagine crunchy, colorful taco shells made from Fruity Pebbles cereal holding a luscious, creamy cheesecake filling that’s both light and indulgent. This dessert effortlessly combines texture, flavor, and a dash of childhood whimsy, making every bite a delightful surprise. Whether you’re serving a crowd or just spoiling yourself, these cheesecake tacos deliver a fun, vibrant experience that’s as visually stunning as it is delicious.
Ingredients You’ll Need
These ingredients are refreshingly simple yet essential, with each one playing a vital role in achieving the perfect balance of crunch, creaminess, and that iconic Fruity Pebbles flair. From the buttery shell to the airy cheesecake filling, everything comes together beautifully.
- 3 cups Fruity Pebbles cereal: Provides the colorful, crunchy base that makes these tacos irresistibly fun.
- 1/2 cup unsalted butter, melted: Binds the cereal to create sturdy, crispy taco shells packed with flavor.
- 8 oz cream cheese, softened: The rich, creamy heart of the cheesecake filling, giving it that smooth and tangy character.
- 1/2 cup powdered sugar, sifted: Adds just the right touch of sweetness without overpowering the filling.
- 1 tsp pure vanilla extract: Enhances the flavor depth, bringing warmth and aroma to the mixture.
- 1 cup whipped cream: Lightens the filling, creating an airy texture that melts in your mouth.
- Additional Fruity Pebbles cereal: For a playful garnish that adds an extra crunch and bursts of color on top.
How to Make Fruity Pebbles Cheesecake Tacos
Step 1: Prepare the Crunchy Shell
Start by combining the Fruity Pebbles cereal with melted butter in a mixing bowl. Stir well to ensure every piece of cereal is thoroughly coated, which will help the shells hold their shape and crispiness after chilling. This simple mix transforms the cereal into a malleable yet crunchy crust base.
Step 2: Shape Your Shells
Firmly press the cereal and butter mixture into small taco-shaped molds or muffin tins. Compacting the mixture tightly is key for sturdy shells that won’t crumble when filled. Pop them into the refrigerator for at least 30 minutes to let them set perfectly into their fun taco shape.
Step 3: Whisk Up the Cheesecake Filling
While the shells chill, use a hand mixer to beat the softened cream cheese until it’s light and fluffy. Slowly add the powdered sugar and vanilla extract, mixing continuously to create a smooth, luscious filling that’s bursting with classic cheesecake flavor.
Step 4: Add Airiness
Next, fold in the whipped cream gently using a spatula. This step is crucial for maintaining the airy texture that sets your cheesecake filling apart from heavier versions. The folding ensures a light, melt-in-your-mouth creaminess that perfectly balances the crunchy shell.
Step 5: Assemble the Tacos
Once your cereal shells are firm and ready, spoon the cheesecake filling generously into each taco shell. You want each bite to deliver a perfect combination of crunchy exterior and creamy interior that’s both fun and flavorful.
Step 6: Garnish and Serve
Finally, sprinkle extra Fruity Pebbles cereal on top of the filled tacos for an added pop of color and crunch. Serve immediately for the freshest texture, or chill further if you prefer a firmer cheesecake consistency. Either way, these Fruity Pebbles Cheesecake Tacos are sure to impress!
How to Serve Fruity Pebbles Cheesecake Tacos
Garnishes
Beyond the extra Fruity Pebbles sprinkled on top, you can get creative by adding thin slices of fresh fruit like strawberries or kiwi for additional color and flavor contrast. A light drizzle of white chocolate or a dusting of edible glitter will also elevate the presentation for special occasions.
Side Dishes
These cheesecake tacos are a dessert showstopper on their own, but they pair beautifully with fresh berries, a scoop of vanilla bean ice cream, or even a refreshing citrus sorbet. The brightness of these sides complements the richness of the cheesecake filling and balances the sweetness perfectly.
Creative Ways to Present
Serve your Fruity Pebbles Cheesecake Tacos on a vibrant platter lined with fresh mint leaves or edible flowers. You could also stack a few for a colorful dessert tower or place them individually in mini taco holders for a charming, party-ready display that invites everyone to dig in.
Make Ahead and Storage
Storing Leftovers
Leftover Fruity Pebbles Cheesecake Tacos should be stored in an airtight container in the refrigerator. The shells will maintain good crunch for a day, but the longer they sit, the more they soften, so it’s best to enjoy them within 24 hours for optimal texture.
Freezing
Freezing is not recommended for these tacos, as the cereal shells lose their crispness and may become soggy after thawing. The delicate nature of the cheesecake filling also means texture can suffer when frozen.
Reheating
Since this is a no-bake dessert, reheating is not necessary. If you prefer the filling a bit less chilled, simply let the tacos sit at room temperature for 10–15 minutes before enjoying.
FAQs
Can I use a different cereal for the taco shells?
Absolutely! While Fruity Pebbles are ideal for their bright colors and crisp texture, you can experiment with other cereals like Rice Krispies or Cocoa Pebbles to create unique flavor profiles. Just make sure the cereal can hold together well when mixed with butter.
How do I soften cream cheese quickly for this recipe?
To soften cream cheese faster, leave it out at room temperature for about 30 minutes before using. Alternatively, soften it gently in the microwave for 10–15 seconds, but watch carefully to avoid melting it.
Can I make these gluten-free?
Yes! Fruity Pebbles are naturally gluten-free, but always check the packaging to be sure. Just verify that any other ingredients, like vanilla extract, are gluten-free too, and you’re good to go.
What’s the best way to get the taco shape?
If you don’t have mini taco molds, using a muffin tin and shaping the cereal mix over clean utensils shaped like taco shells can work. You can also carefully mold by hand while chilling to help them hold their form.
Can I prepare the filling a day ahead?
Definitely. The cheesecake filling can be made a day in advance and kept refrigerated. Just fold in the whipped cream right before assembling to keep the light texture intact.
Final Thoughts
These Fruity Pebbles Cheesecake Tacos are a vibrant, playful dessert that’s sure to brighten any occasion and bring a smile to anyone lucky enough to take a bite. With their perfect contrast between crunchy, colorful shells and fluffy, creamy filling, they’re a joyous celebration of flavor and nostalgia. Go ahead, dive into this fun recipe and treat yourself to a whimsical dessert that feels like a sweet hug from your childhood!
PrintFruity Pebbles Cheesecake Tacos Recipe

These Fruity Pebbles Cheesecake Tacos are a delightful and colorful dessert that combines a crunchy fruity cereal shell with a creamy, fluffy cheesecake filling. Perfect for parties or a fun treat, they offer a sweet and tangy flavor with a unique presentation that’s sure to impress.
- Prep Time: 15 minutes
- Cook Time: 0 minutes
- Total Time: 45 minutes
- Yield: 8 taco shells 1x
- Category: Dessert
- Method: No-bake
- Cuisine: American
- Diet: Vegetarian
Ingredients
Crunchy Shell
- 3 cups Fruity Pebbles cereal
- 1/2 cup unsalted butter, melted
Cheesecake Filling
- 8 oz cream cheese, softened to room temperature
- 1/2 cup powdered sugar, sifted
- 1 tsp pure vanilla extract
- 1 cup whipped cream
Garnish
- Additional Fruity Pebbles cereal for topping
Instructions
- Prepare the Crunchy Shell: Combine the fruity cereal and melted butter thoroughly in a mixing bowl until each piece of cereal is evenly coated, creating a sticky mixture that will hold shape.
- Shape Your Shells: Press the cereal mixture firmly into small taco-shaped molds or muffin tins, ensuring the mixture is compacted tightly to prevent crumbling. Refrigerate the shaped shells for at least 30 minutes to firm up.
- Whisk Up the Cheesecake Filling: Using a hand mixer, beat the softened cream cheese until light and fluffy. Gradually add the sifted powdered sugar and vanilla extract, blending until the mixture is smooth and creamy.
- Add Airiness: Gently fold the whipped cream into the cream cheese mixture using a spatula, taking care not to deflate the mixture, to maintain a light and airy texture perfect for filling.
- Assemble the Tacos: Once the cereal shells are firm, spoon the cheesecake filling generously into each shell, filling them evenly to the edges.
- Garnish and Serve: Sprinkle additional Fruity Pebbles cereal over the filled taco shells for extra crunch and color. Serve immediately for a soft shell texture or chill in the refrigerator for a firmer cheesecake filling.
Notes
- For best results, soften the cream cheese to room temperature before mixing to avoid lumps.
- The taco molds or muffin tins ensure the cereal shells hold their shape; if unavailable, shape by hand but chill well to firm.
- If you prefer a less sweet dessert, reduce the powdered sugar slightly.
- Store leftover tacos in the refrigerator in an airtight container and consume within 2 days.
- Adding whipped cream gives the filling a lighter texture; you can substitute with whipped topping if preferred.
Nutrition
- Serving Size: 1 taco
- Calories: 280
- Sugar: 18g
- Sodium: 150mg
- Fat: 18g
- Saturated Fat: 8g
- Unsaturated Fat: 8g
- Trans Fat: 0g
- Carbohydrates: 22g
- Fiber: 1g
- Protein: 4g
- Cholesterol: 40mg
Keywords: Fruity Pebbles, cheesecake, dessert tacos, no bake dessert, fruity cereal dessert, fun dessert for kids