Easy Creamy Chocolate Popsicles Recipe
Nothing beats the joy of indulging in homemade frozen treats, and these Easy Creamy Chocolate Popsicles truly take the award for simplicity and deliciousness combined. Made from a dreamy blend of coconut whipped cream, rich cacao, and a hint of vanilla, these popsicles offer a luscious, smooth texture that melts in your mouth with every bite. Whether you’re looking for a refreshing afternoon delight or a charming dessert to wow your guests, this recipe effortlessly delivers on flavor and creaminess, making it a must-try for any chocolate lover.
Ingredients You’ll Need
Getting the ingredients right is key to crafting these perfect popsicles. Each component plays a vital role in creating that luscious texture and deep chocolate flavor, all while keeping the recipe wonderfully simple and approachable.
- 400 ml coconut whipped cream: This provides the creamy base with a hint of tropical richness that’s essential for smooth popsicles.
- 215 g coconut condensed milk: Adds natural sweetness and a velvety body that makes the popsicles irresistibly decadent.
- 55 g high-quality cacao powder: For the bold, authentic chocolate flavor that’s unmistakable and satisfying.
- Pinch of salt: Enhances the chocolate’s depth and balances the sweetness beautifully.
- 1 teaspoon vanilla extract (optional): Lends a warm, fragrant note that elevates the overall flavor profile.
- 100 g dark chocolate: To create an optional rich coating that adds a delightful crunch.
- 1 teaspoon coconut oil or peanut butter: Helps melt and smooth the chocolate for coating while imparting a subtle richness.
- Chopped nuts (optional): For a crunchy, textured topping if you decide to jazz up your popsicles.
How to Make Easy Creamy Chocolate Popsicles
Step 1: Prepare Equipment and Ingredients
Start by arranging your popsicle molds and sticks on a tray or surface where they can stay steady. Make sure all your ingredients are pre-measured and within reach—this helps keep the process smooth and stress-free.
Step 2: Combine Base Mixture
In a small saucepan, combine the coconut whipped cream, coconut condensed milk, cacao powder, salt, and vanilla extract if you’re using it. This is the magic mix that creates the luscious body of your popsicles.
Step 3: Heat Gently
Place the saucepan over low heat and stir the mixture frequently. The goal is to warm everything through just enough to blend the flavors and create a uniform, pourable consistency—avoid boiling at all costs to keep the texture silky and rich.
Step 4: Pour and Freeze
Carefully pour the chocolate mixture into the prepared molds, dividing it evenly. Insert the sticks and then pop the molds into the freezer. Let them chill for at least 3 hours so they can set perfectly firm for that ideal creamy bite.
Step 5: Unmould Popsicles
When ready to enjoy, briefly dip your metal or plastic molds into hot water (3 seconds is enough) to loosen the popsicles, then pull gently on the sticks to release. Silicone molds make this step a breeze—you just press the popsicles out gently by hand.
Step 6: Soften for Serving
Allow your popsicles to sit at room temperature for a few minutes before eating. This slight softening is especially important if your kitchen is cool, ensuring the popsicles are creamy and easy to bite.
Step 7: Optional Chocolate Coating
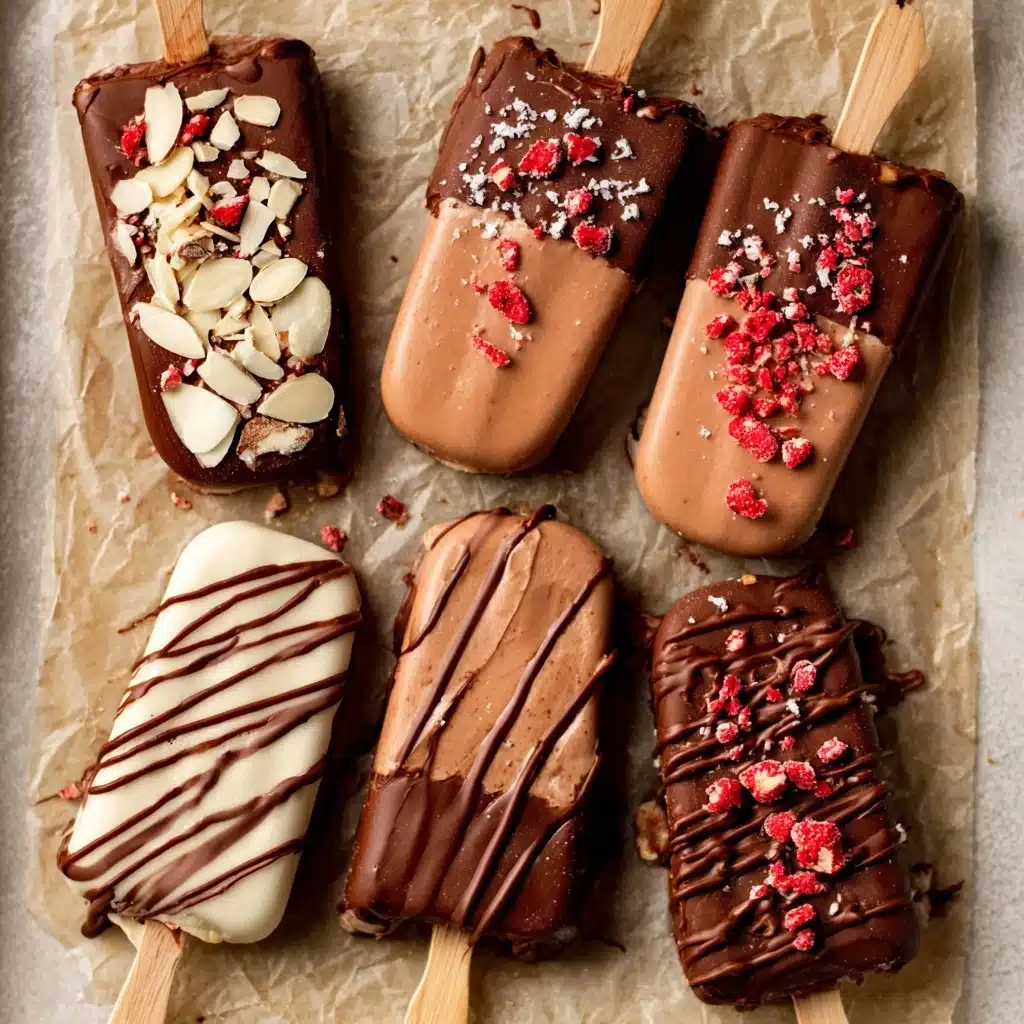
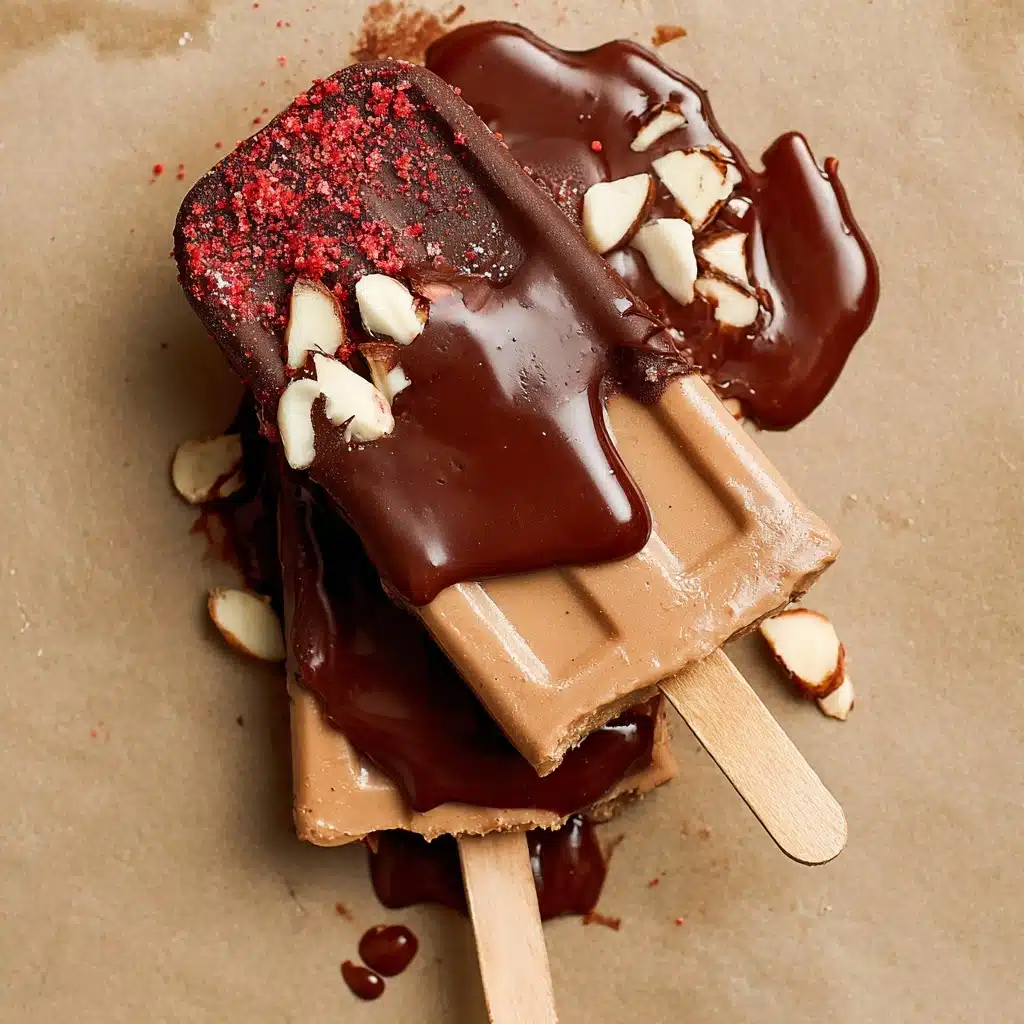
If you’re feeling indulgent, melt dark chocolate and coconut oil (or peanut butter) using a double boiler until smooth and liquid. Dip each popsicle quickly into the chocolate, then rest them on baking paper-lined trays. You can sprinkle chopped nuts over the coating before it sets for a lovely crunch.
Step 8: Set Coating and Store
Return dipped popsicles to the freezer for about 5 minutes to let the chocolate harden. Once set, store your Easy Creamy Chocolate Popsicles in an airtight container or ziplock bag for freshness until you’re ready to delight in them.
How to Serve Easy Creamy Chocolate Popsicles
Garnishes
While these popsicles are scrumptious on their own, garnishing with chopped toasted nuts, shredded coconut, or even a light dusting of cocoa powder adds a wonderful extra layer of flavor and texture. These toppings can turn a simple treat into a mini celebration on a stick.
Side Dishes
Pair your popsicles with fresh berries, a drizzle of raspberry coulis, or coconut cookies for a refreshing and balanced dessert plate. The subtle tang from berries cuts through the richness and creates an exciting taste contrast.
Creative Ways to Present
Impress your friends by serving these popsicles in cute, individual glasses filled with a bit of crushed ice or edible flowers for that extra wow factor. You can also tie a colorful ribbon around each popsicle stick to make the presentation festive and fun.
Make Ahead and Storage
Storing Leftovers
If you have leftover popsicles, keep them in an airtight container or a resealable bag in the freezer to prevent fridge odors from affecting their delicate flavor. Proper sealing maintains their creamy texture and freshness.
Freezing
You can prepare the popsicles in advance and keep them frozen for up to two weeks. When you’re ready to serve, just follow the simple unmoulding and softening steps to enjoy them at peak creaminess.
Reheating
Reheating isn’t really needed for popsicles, but allowing them to soften slightly at room temperature for a few minutes is the key to unlocking that squishy, creamy texture that makes each bite so delightful.
FAQs
Can I use regular cream instead of coconut whipped cream?
You certainly can, although coconut whipped cream lends a subtle coconut flavor and a dairy-free quality that’s part of what makes these popsicles so unique and creamy.
Is it necessary to heat the mixture before freezing?
Yes, gently heating ensures the cacao powder dissolves fully and the ingredients blend smoothly, preventing graininess in your popsicles.
Can I make these popsicles without the chocolate coating?
Absolutely! The chocolate coating is completely optional and doesn’t affect the core deliciousness of the popsicles. They’re perfect plain or coated.
What’s the best way to remove popsicles from silicone molds?
Simple! Press from the bottom up carefully. Silicone’s flexibility makes it much easier than metal or plastic molds.
Can I substitute peanut butter in the chocolate coating?
Yes, peanut butter adds a lovely nutty richness and helps the chocolate coating set nicely, but coconut oil alone works well too if you prefer a purer chocolate flavor.
Final Thoughts
These Easy Creamy Chocolate Popsicles are a total game-changer when it comes to homemade frozen treats. They’re indulgently smooth, rich in chocolate flavor, and surprisingly simple to make with ingredients you can feel good about. Whether you’re cooling off on a summer day or craving a sweet evening dessert, this recipe invites you to enjoy both comfort and creativity in a single delightful bite. Give them a try—you won’t believe how easy and rewarding it is to create your own creamy chocolate popsicles at home!
PrintEasy Creamy Chocolate Popsicles Recipe
These easy creamy chocolate popsicles combine rich coconut whipped cream and condensed milk with high-quality cacao powder for a decadent dairy-free treat. Enhanced with a hint of vanilla and optional dark chocolate coating, they offer a smooth, indulgent texture perfect for warm days or anytime a refreshing dessert is desired.
- Prep Time: 10 minutes
- Cook Time: 10 minutes
- Total Time: 3 hours 20 minutes
- Yield: 8 popsicles 1x
- Category: Dessert, Snack
- Method: Freezing, Gentle heating
- Cuisine: International
- Diet: Vegan
Ingredients
Base Mixture
- 400 ml coconut whipped cream
- 215 g coconut condensed milk
- 55 g high-quality cacao powder
- Pinch of salt
- 1 teaspoon vanilla extract (optional)
Chocolate Coating (Optional)
- 100 g dark chocolate
- 1 teaspoon coconut oil or peanut butter
- Chopped nuts (optional)
Instructions
- Prepare Equipment and Ingredients: Arrange your popsicle molds and sticks, making sure all your ingredients are accurately measured and ready at hand for a smooth process.
- Combine Base Mixture: In a small saucepan, add coconut whipped cream, coconut condensed milk, high-quality cacao powder, a pinch of salt, and vanilla extract if using.
- Heat Gently: Warm the mixture over low heat, stirring frequently until the blend is smooth and pourable. Take care not to let it boil to preserve the creamy texture and flavor.
- Pour and Freeze: Evenly distribute the chocolate base mixture into 8 popsicle molds. Insert the sticks and place them into the freezer for at least 3 hours until fully set.
- Unmould Popsicles: For metal or plastic molds, briefly dip them in very hot water for about 3 seconds before carefully pulling out the popsicles by their sticks. For silicone molds, gently press them out.
- Soften for Serving: Let the popsicles sit at room temperature for a few minutes to soften slightly, which is especially helpful if the environment is cooler.
- Optional – Prepare Chocolate Coating: Line a tray with baking paper. Using a double boiler, melt the dark chocolate with coconut oil or peanut butter until fluid. Dip each popsicle into the chocolate and then place them on the tray. Optionally, sprinkle chopped nuts on top while the coating is still liquid.
- Set Coating and Store: Return the dipped popsicles to the freezer for about 5 minutes to harden the chocolate coating. Store finished popsicles in an airtight container or ziplock bag until ready to enjoy.
Notes
- Use high-quality cacao powder and dark chocolate for the best rich chocolate flavor.
- Do not boil the base mixture as it may alter the texture and taste.
- Optionally add vanilla extract to enhance flavor complexity.
- Chopped nuts add a delightful crunch but can be skipped for a nut-free version.
- Silicone molds facilitate easier unmolding compared to metal or plastic ones.
- These popsicles are dairy-free and naturally suited for vegan diets.
Nutrition
- Serving Size: 1 popsicle (approximately 120g)
- Calories: 220 kcal
- Sugar: 18 g
- Sodium: 30 mg
- Fat: 15 g
- Saturated Fat: 13 g
- Unsaturated Fat: 2 g
- Trans Fat: 0 g
- Carbohydrates: 20 g
- Fiber: 4 g
- Protein: 2 g
- Cholesterol: 0 mg
Keywords: Chocolate popsicles, creamy chocolate popsicles, vegan chocolate dessert, coconut popsicles, homemade frozen treat


